Sensor TOF10120 adalah sensor jarak berbasis teknologi laser Time-of-Flight yang mampu mengukur jarak dengan akurasi tinggi. Dengan Arduino, kita bisa memanfaatkan sensor ini untuk berbagai proyek pemantauan jarak. Dalam blog ini, kita akan membahas cara mudah menghubungkan dan menggunakan sensor TOF10120 dengan Arduino. Let’s get started!

untuk codenya kalian bisa gunakan code dibawah ini :
#include <Arduino.h>

#include <Wire.h>

unsigned char ok_flag;
unsigned char fail_flag;

unsigned short lenth_val = 0;
unsigned char i2c_rx_buf[16];
unsigned char dirsend_flag = 0;


void SensorRead(unsigned char addr, unsigned char* datbuf, unsigned char cnt) {
  unsigned short result = 0;
  // step 1: instruct sensor to read echoes
  Wire.beginTransmission(82);  // transmit to device #82 (0x52)
  // the address specified in the datasheet is 164 (0xa4)
  // but i2c adressing uses the high 7 bits so it's 82
  Wire.write(byte(addr));  // sets distance data address (addr)
  Wire.endTransmission();  // stop transmitting
  // step 2: wait for readings to happen
  delay(1);  // datasheet suggests at least 30uS
  // step 3: request reading from sensor
  Wire.requestFrom(82, cnt);  // request cnt bytes from slave device #82 (0x52)
  // step 5: receive reading from sensor
  if (cnt <= Wire.available()) {  // if two bytes were received
    *datbuf++ = Wire.read();      // receive high byte (overwrites previous reading)
    *datbuf++ = Wire.read();      // receive low byte as lower 8 bits
  }
}

int ReadDistance() {
  SensorRead(0x00, i2c_rx_buf, 2);
  lenth_val = i2c_rx_buf[0];
  lenth_val = lenth_val << 8;
  lenth_val |= i2c_rx_buf[1];
  delay(300);
  return lenth_val;
}


void setup()
{
Serial.begin(9600);
 Wire.begin();
  Serial.begin(9600, SERIAL_8N1);

}
void loop(){
  int jarak_laser = ReadDistance();
  Serial.print(jarak_laser);
  Serial.println(" mm");


}
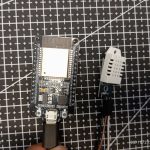
Untuk skematik, kamu bisa ikuti skematick di bawah ini

Kabel Hitam : GND
Kabel Merah : VCC
Kabel Biru : RXD
Kabel Hijau : TXD
Kabel Kuning : SCL
Kabel Putih : SDL
selamat mencoba, salam labrobotika
Jika anda berminat menggunakan jasa labrobotika, silahkan hubungi admin: WHATSAPP